You can integrate Snap Pixel into your online store to help you understand more about customer behaviors and the traffic sources. It allows you to collect actions that people take on your store so that you can track conversions or plan your ad campaigns to target customers more effectively.
In this article
A. Create Snap Pixel
B. Install Snap Pixel ID on ShopBase store
C. Verify your Snap Pixel
D. Troubleshoot duplicated events
E. Snap Pixel events
A. Create Snap Pixel
Click the menu in the top left corner and select Events Manager.
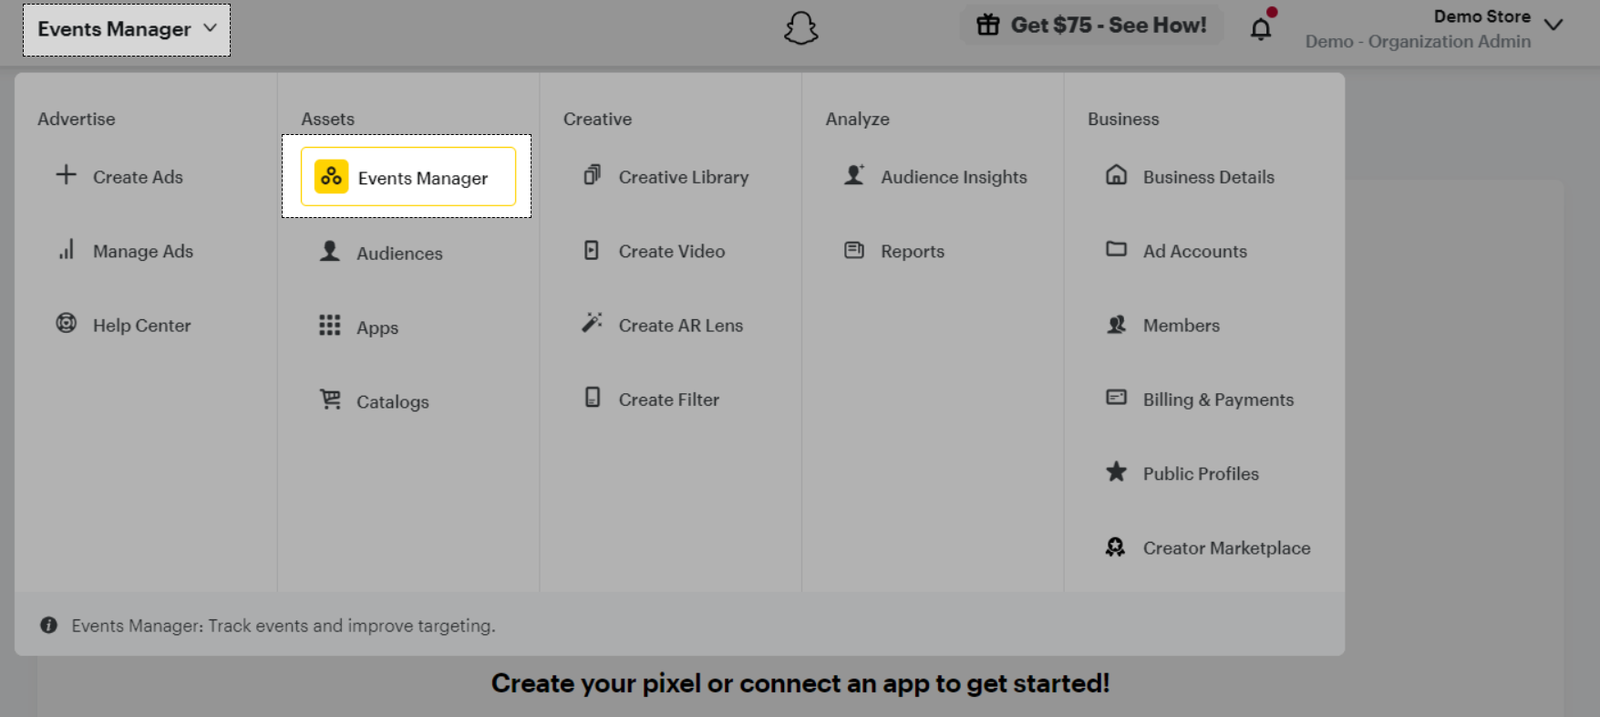
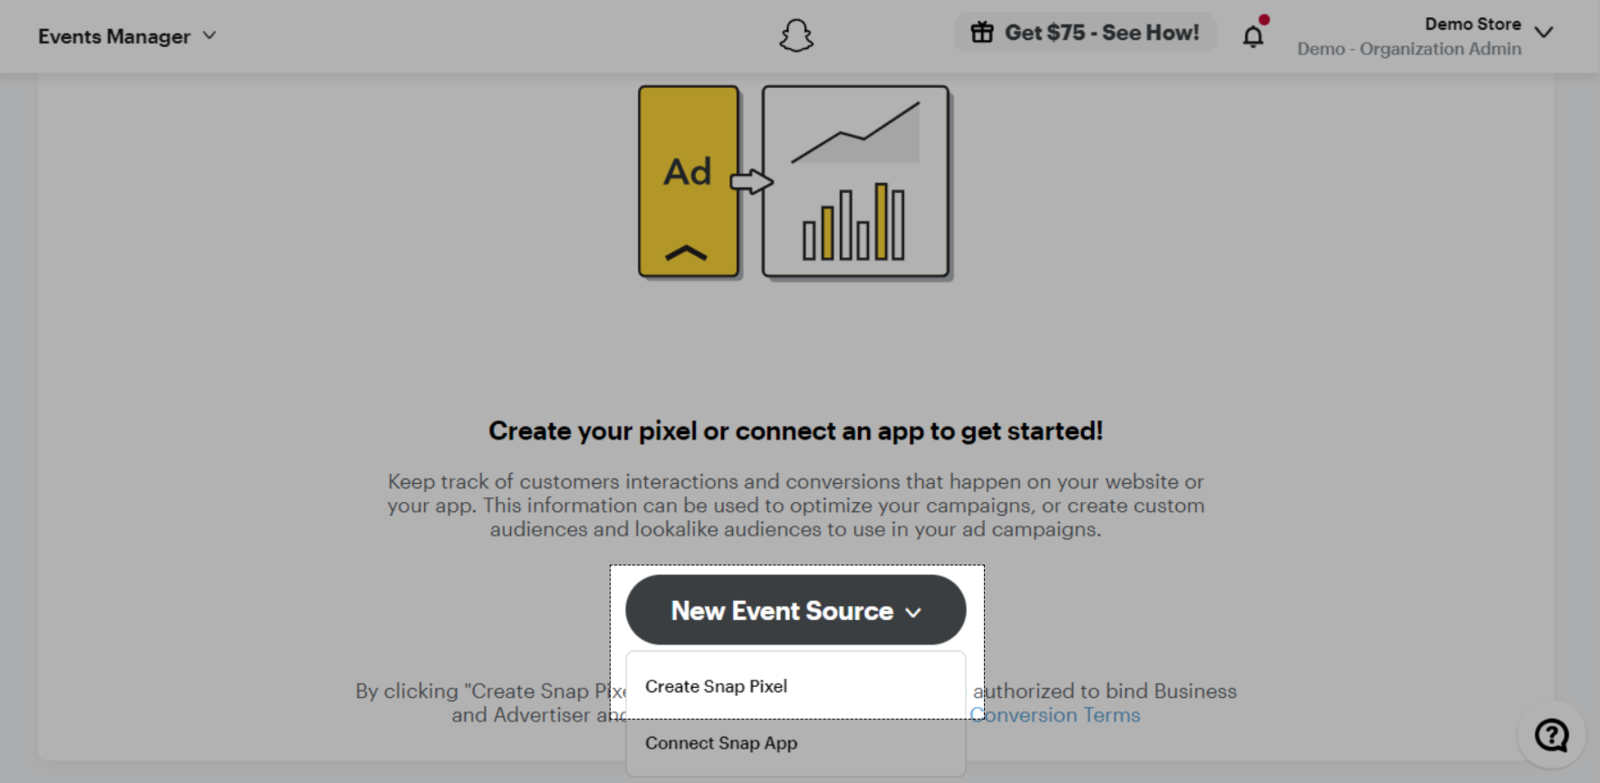
Select New Event Source and click Create Snap Pixel in the middle of the screen.
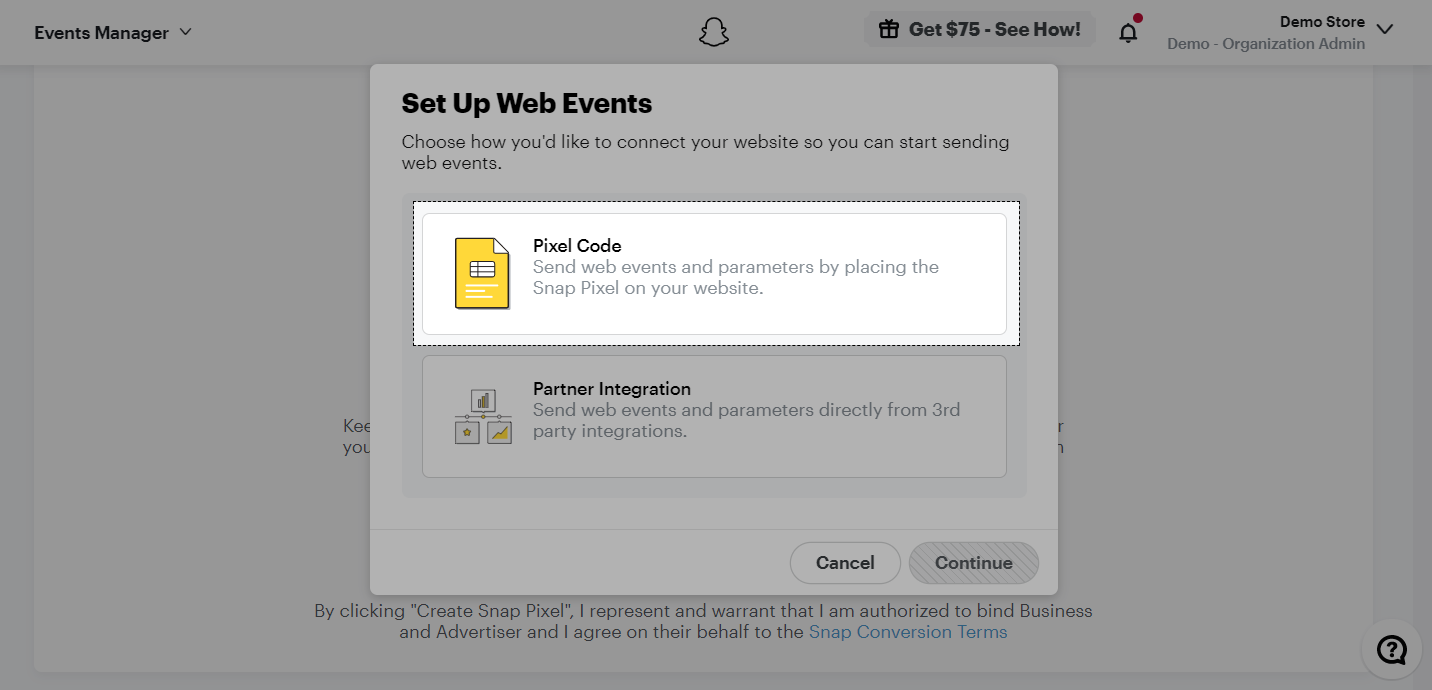
Select Pixel Code and click Continue.
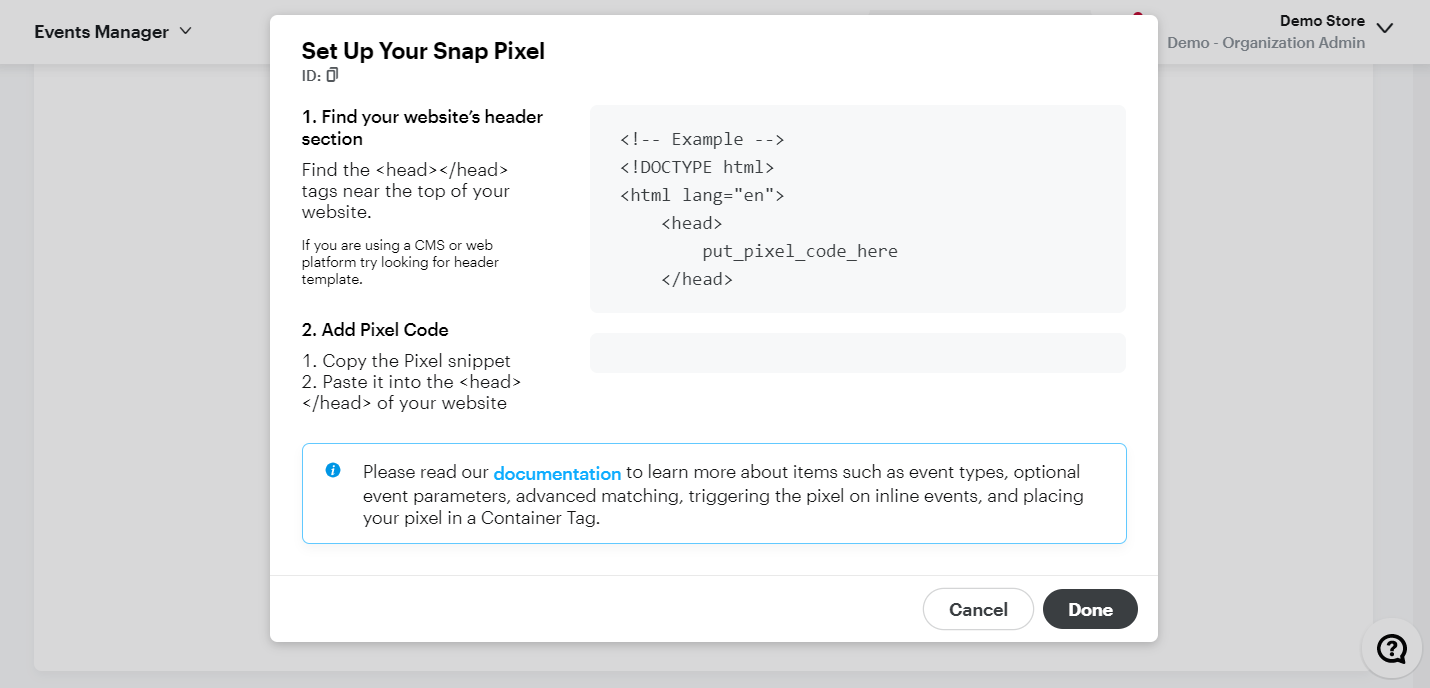
Your Pixel has been created. You will be prompted with a pop up that provides all the necessary details and instructions on setting up your Snap Pixel. Copy the Pixel ID.
B. Install Snap Pixel ID on ShopBase store
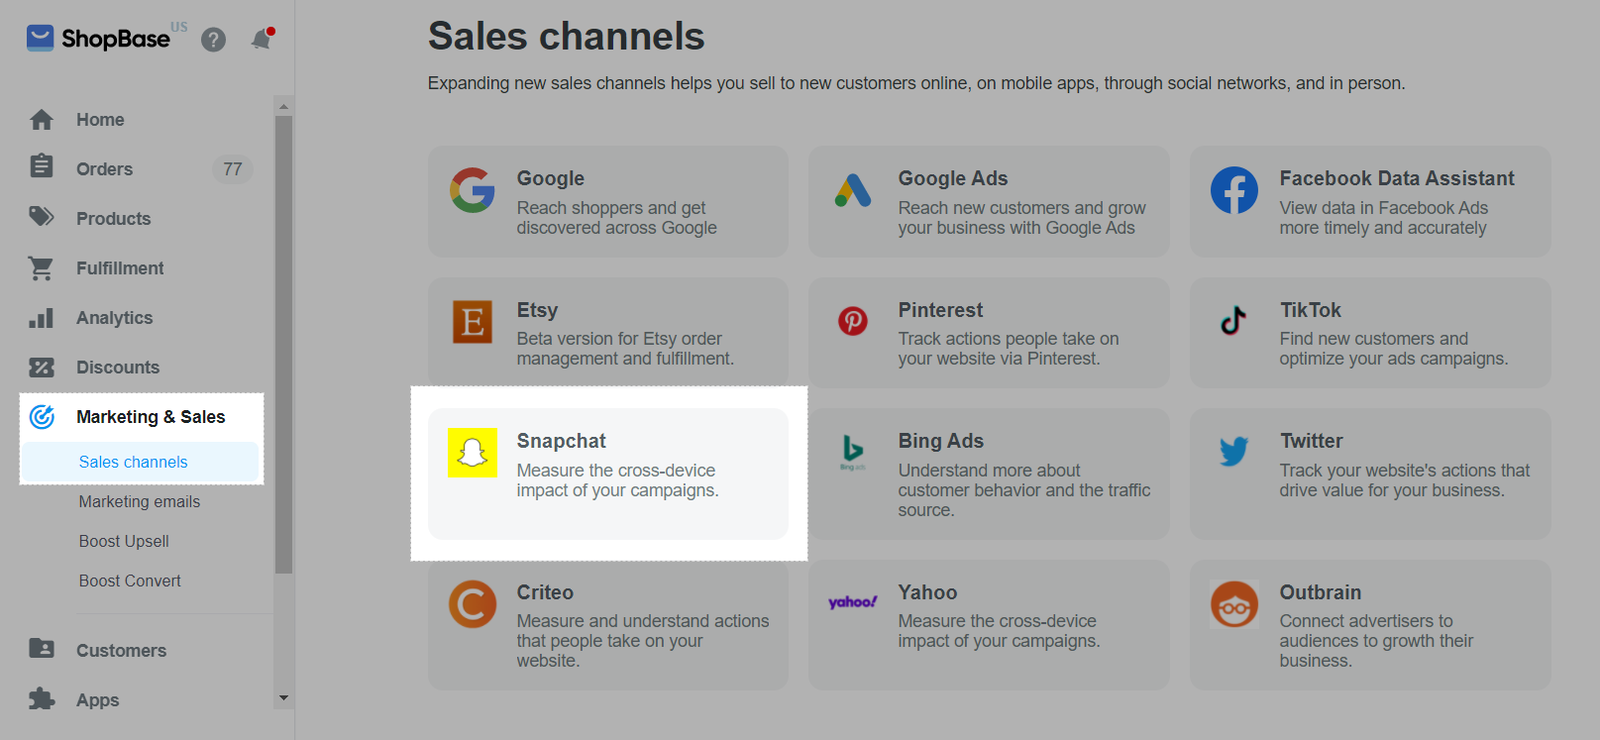
From your ShopBase admin site, go to Marketing & Sales > Sales channels and select Snapchat.
Paste the Snap Pixel ID that you have previously copied in part A.
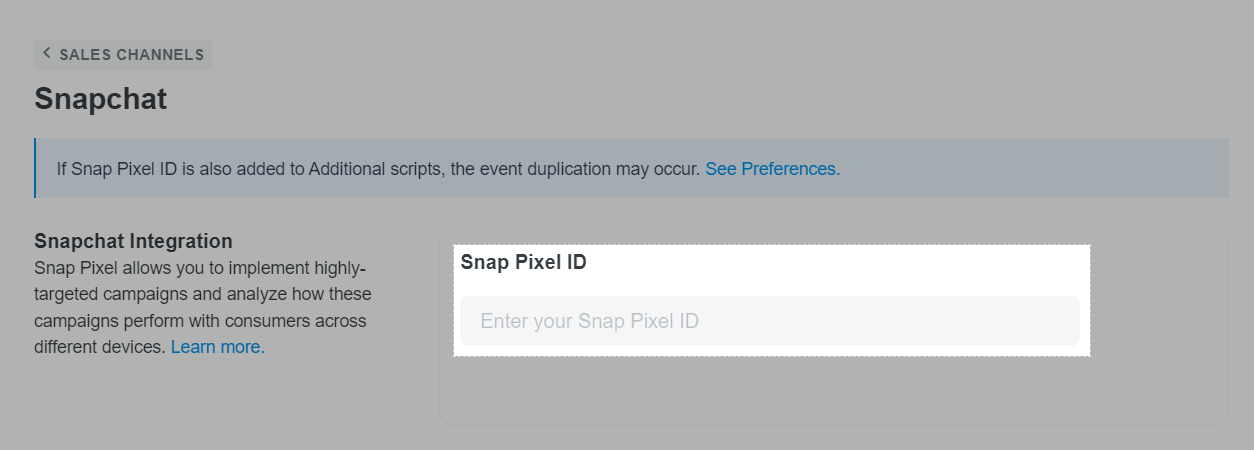
A ShopBase store can only have 1 Snap Pixel to follow Snapchat's standard of best practice.
Click Save changes.
C. Verify your Snap Pixel
Go to any product pages on your online store, click on the icon to check if your tag is working correctly. For more information on this extension, please read
this article.
D. Troubleshoot duplicated events
Along with the above method, you can track your customer behaviors by manually adding the Snap Pixel tracking script to Additional Script. However, if the two methods are applied simultaneously, each event will be sent more than once, leading to the data duplication.
To solve this problem, go to Preferences > Additional scripts and delete the Snap Pixel script added before.
E. Snap Pixel events
When an action happens on your online store after you've added a Snap Pixel in ShopBase, Snapchat counts the action as an event. You can use event data to learn more about how customers interact with your store.
After you integrate a Snap Pixel with your online store, it automatically tracks 4 events, with their descriptions as follows:
VIEW_CONTENT: When a visitor views a product page.
ADD_CART: When a visitor adds a product to the shopping cart.
START_CHECKOUT: When a visitor clicks on the checkout button.
PURCHASE: When a visitor completes a purchase and views the thank you page in the checkout.
Related articles


