Razorpay is the payment solution in India that allows businesses to accept, process and disburse payments with its product suite. This article has been crafted to assist you in effortlessly connecting Razorpay as the preferred payment gateway for your online store.
In this article
A. Set up Razorpay Business Account
B. Get the key ID, key secret in Razorpay
D. Activate Razorpay as your payment method
E. Deactivate your Razorpay account
A. Set up Razorpay Business Account
Log in to Razorpay dashboard with your business account. . If you haven't created an account yet, please register one.
To get the official account, you need to submit KYC. Please contact Razorpay for more information and specific details regarding the KYC submission process.
B. Get the key ID, key secret in Razorpay
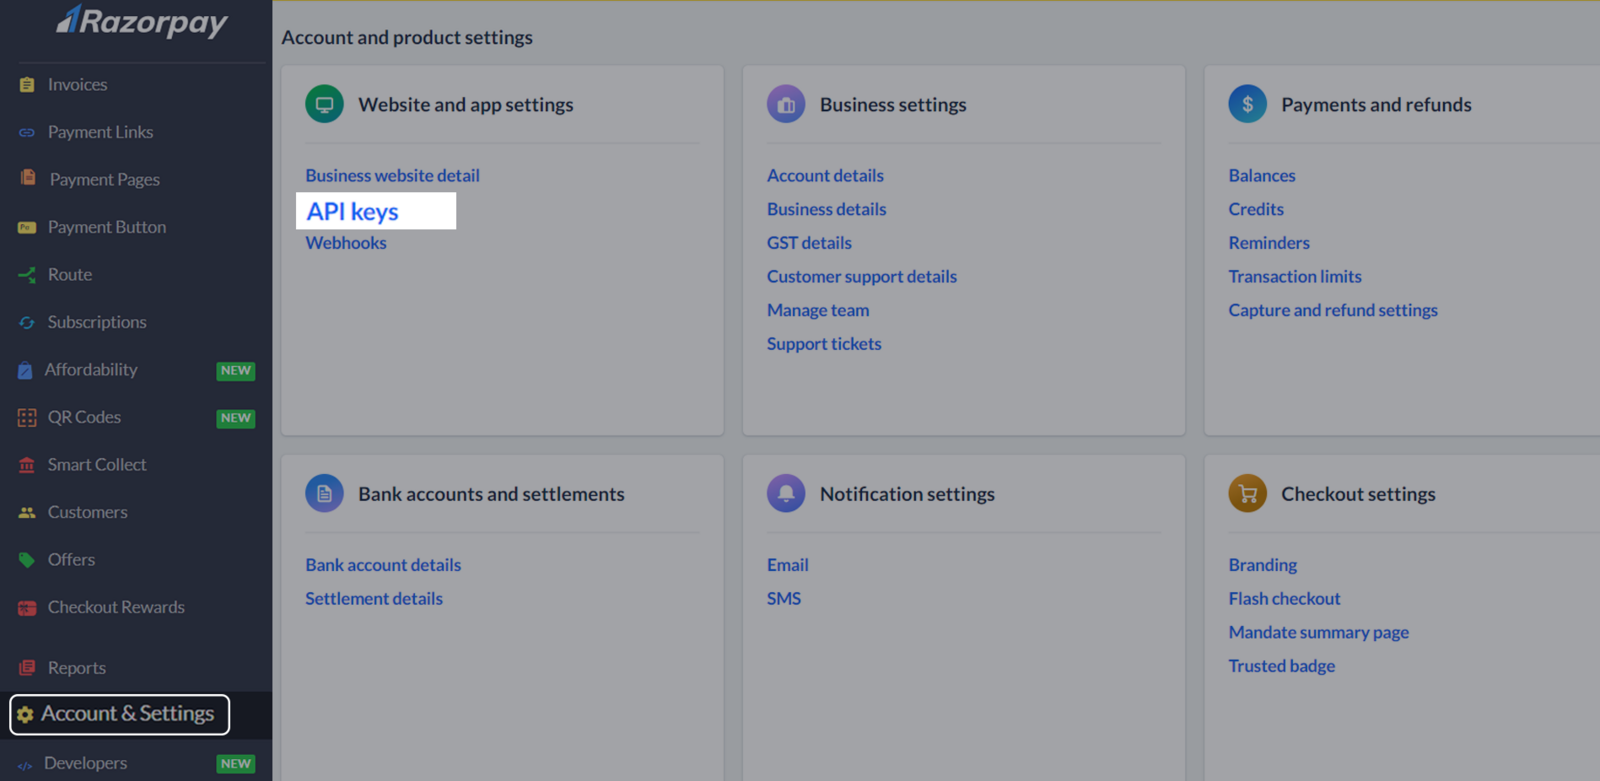

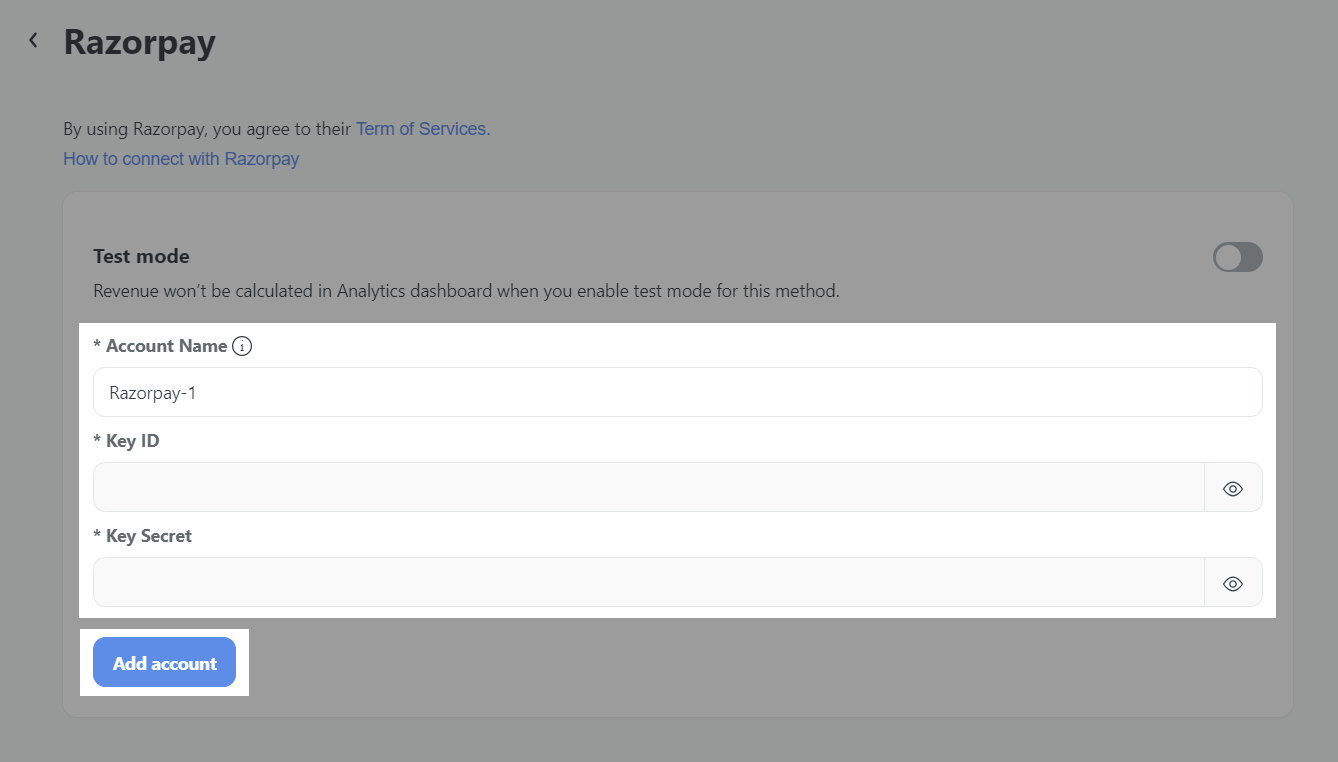
Select the appropriate option to generate API keys for either the test mode or the live mode.
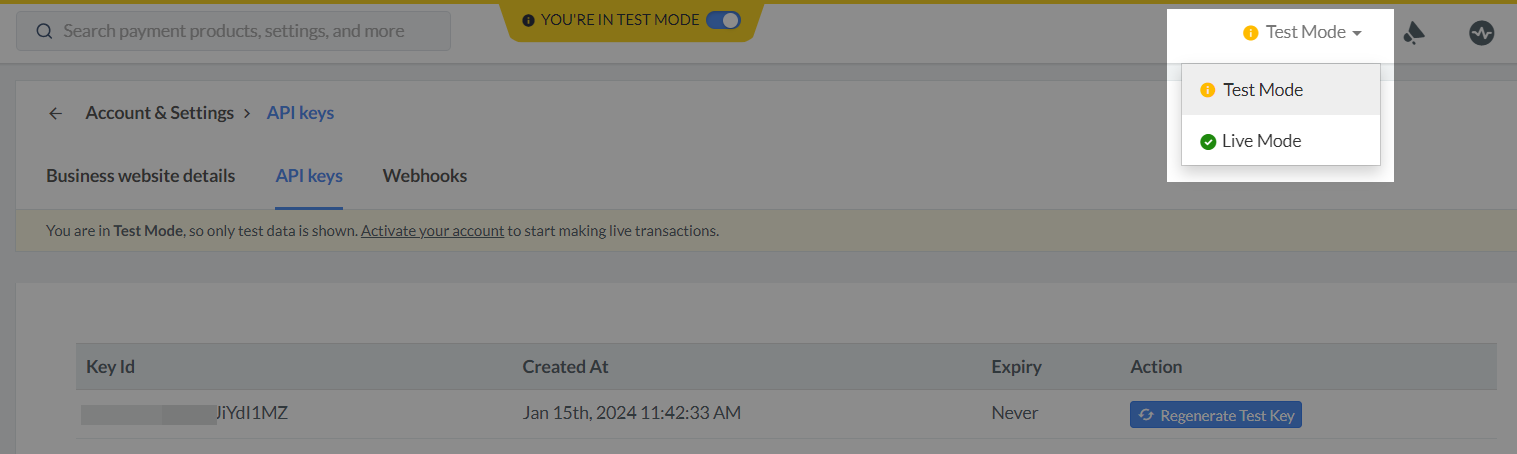
Please note that the test mode is only for testing purposes and cannot be used to receive actual payments.
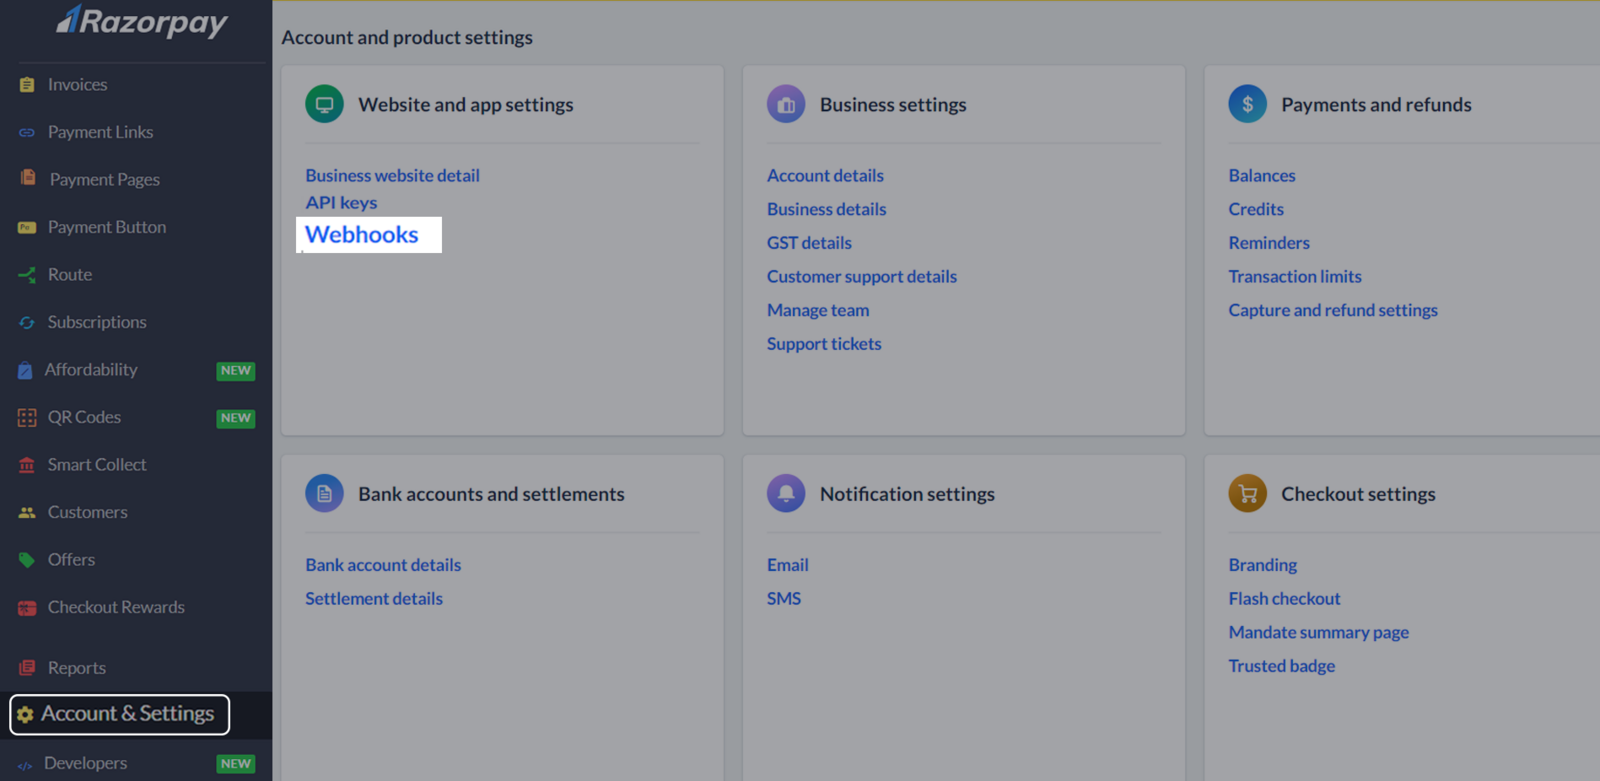
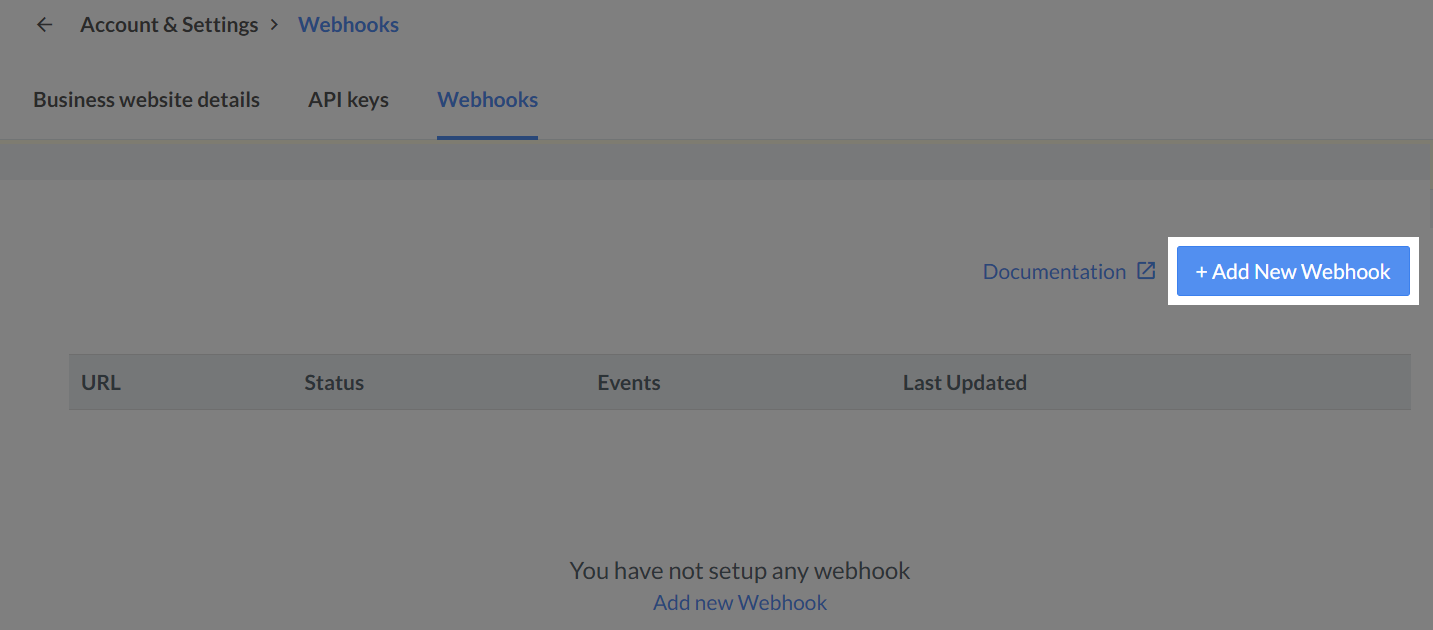
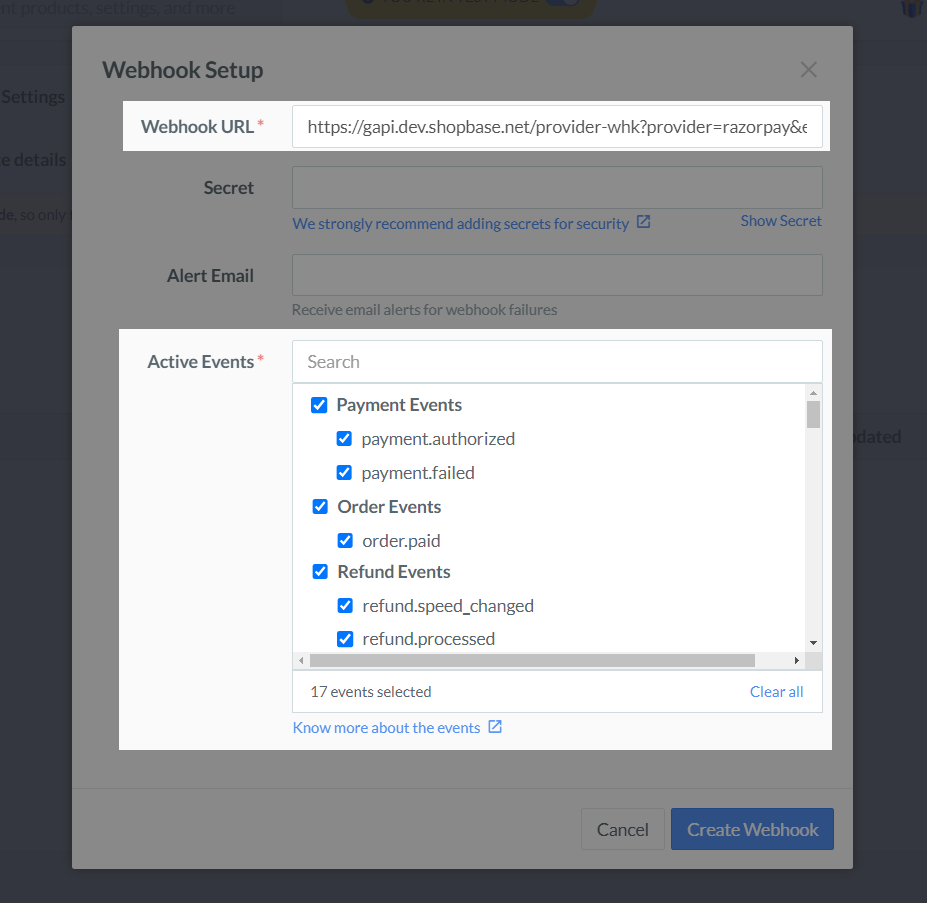
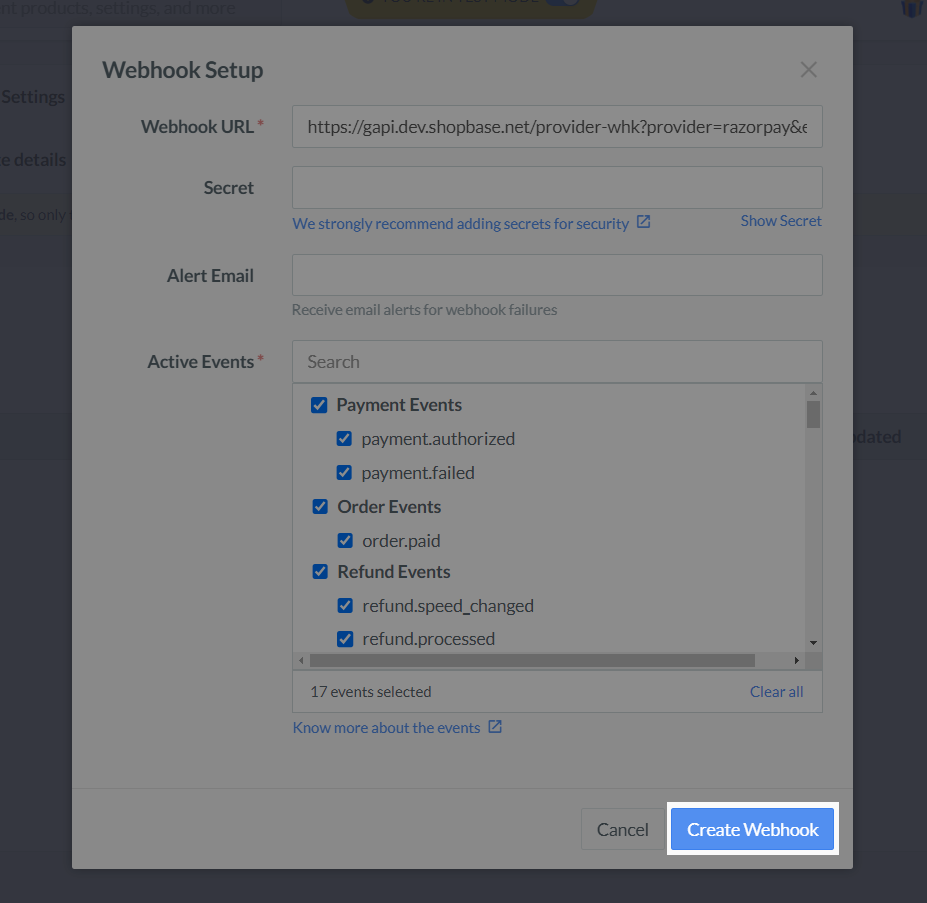
C. Configure webhooks
Test mode: https://gapi.dev.shopbase.net/provider-whk?provider=razorpay&env=dev
Live mode: https://api.shopbase.com/provider-whk?provider=razorpay&env=prod
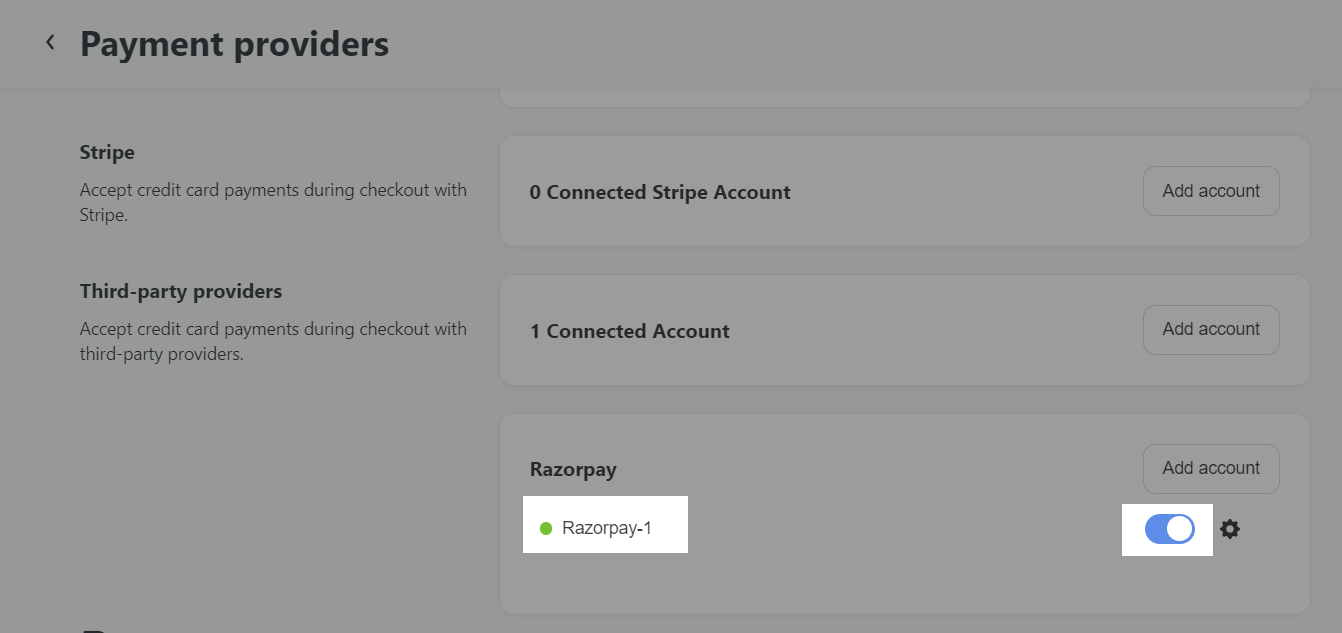
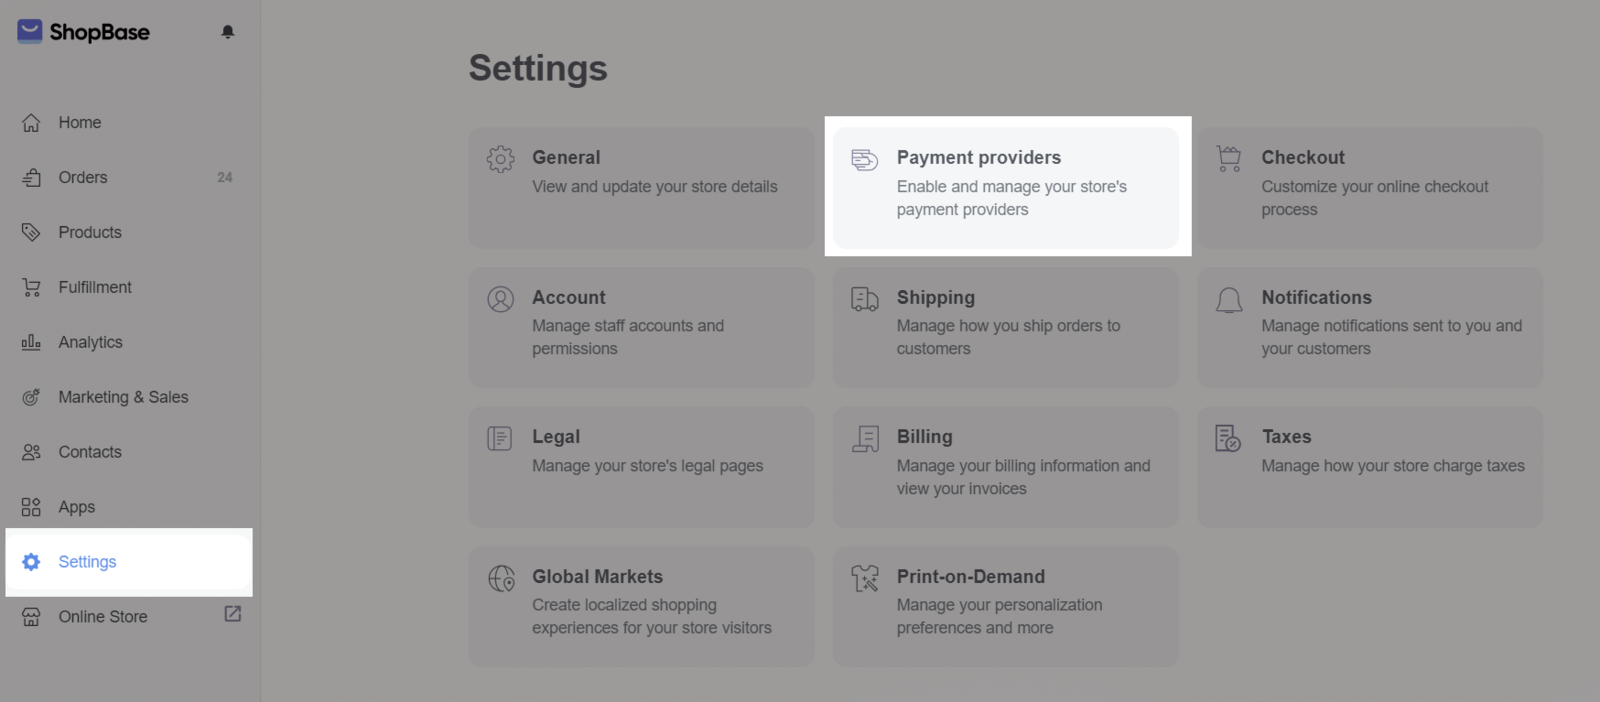
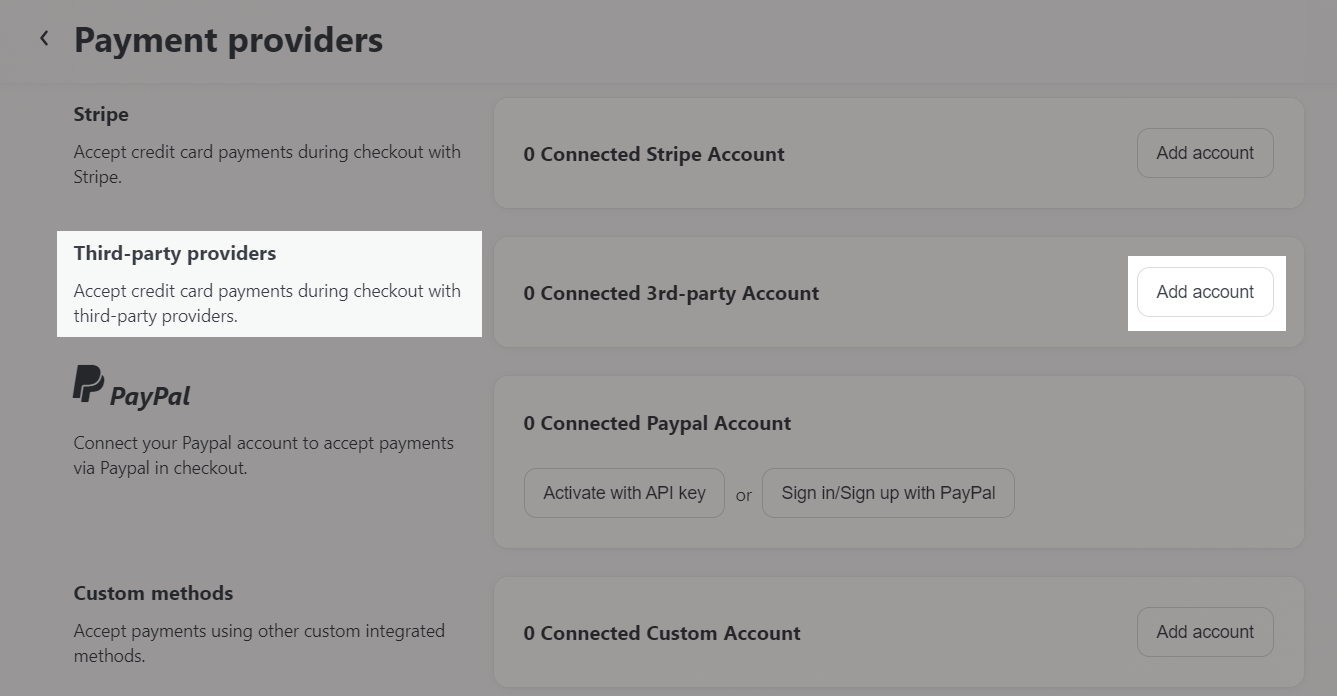
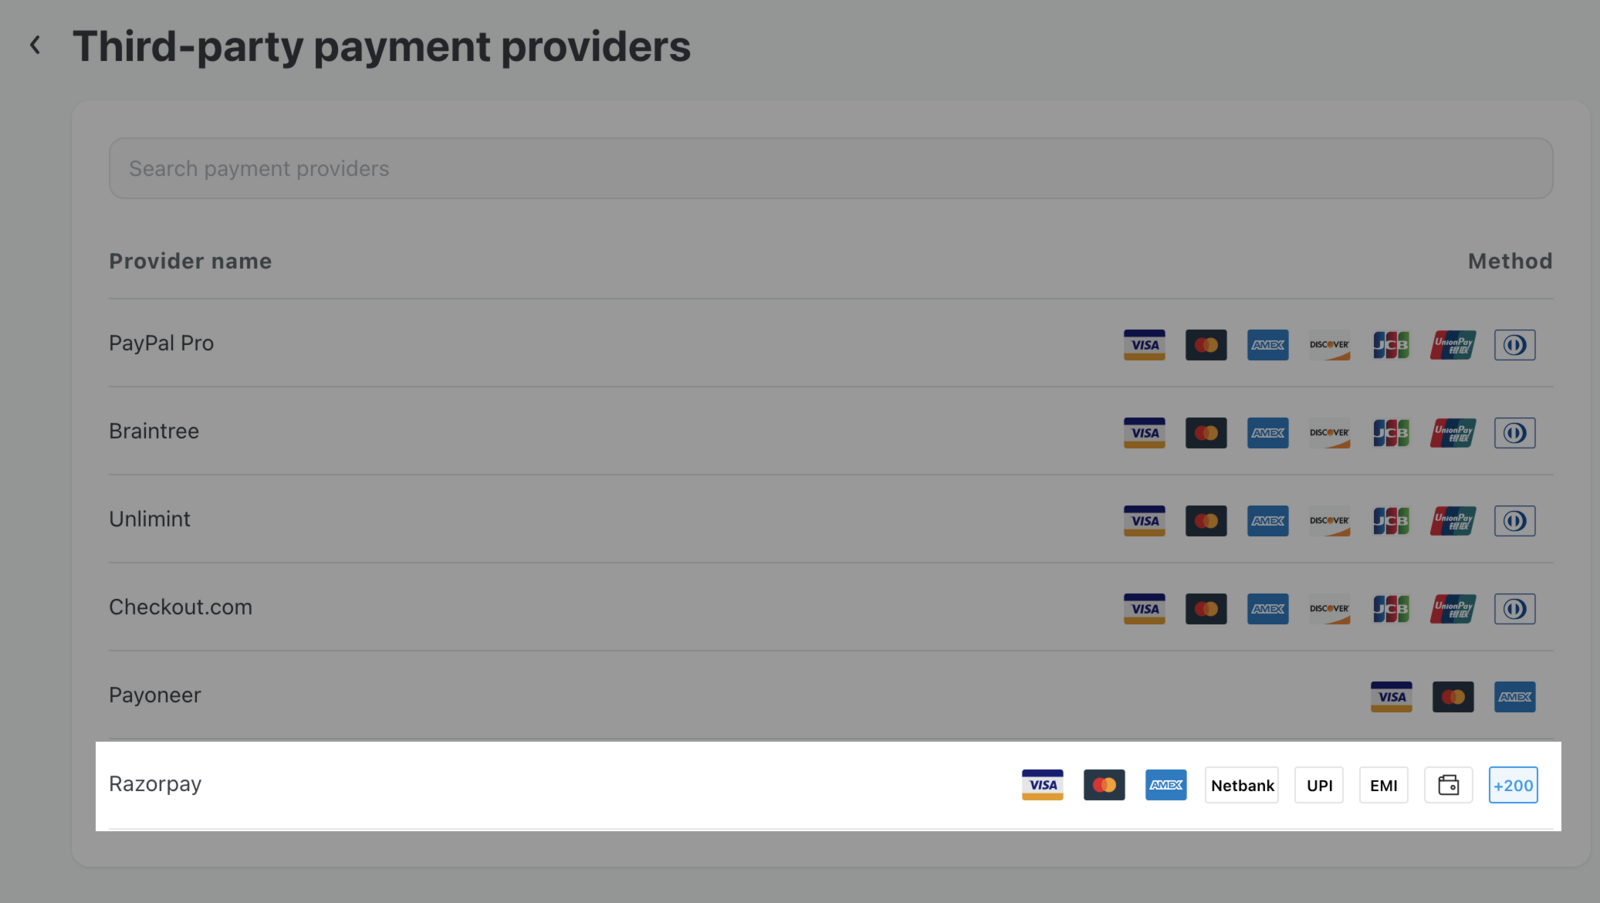
D. Activate Razorpay as your payment method
To enhance the security of your account, ShopBase will not share any information related to your store, including your store name, store domain, product name, etc., with payment gateways. This measure is in place to mitigate the risk of your account being restricted.
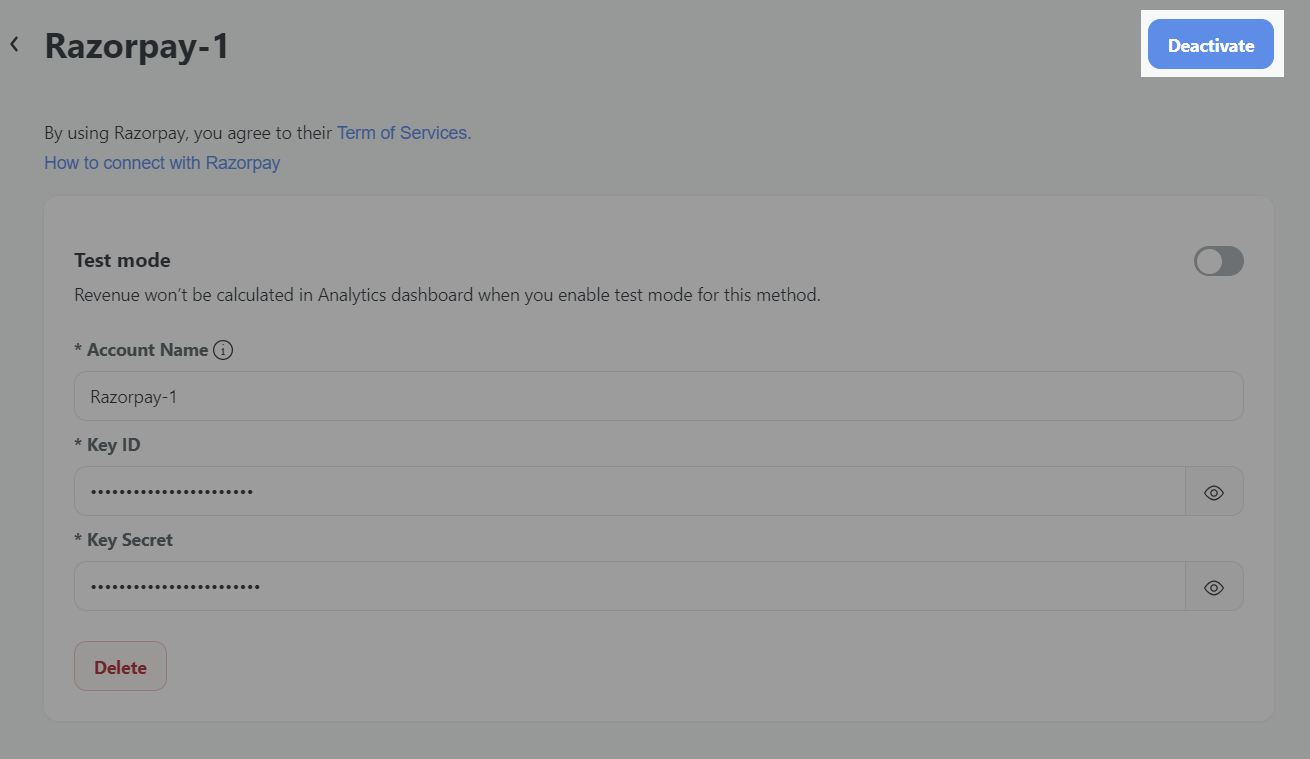
E. Deactivate your Razorpay account
After connecting your Razorpay account to the store, you can deactivate it anytime by 2 ways and still be able to re-activate it later.